

Abe’s Crib
My firstborn slept in a Graco Pack-n-Play for his first 7 months of life, so out of a desire to immerse him in natural materials and thoughtful design, I built a crib (and eventually convertible twin bed) out of some nice natural 5/4 American Cherry. This was also a chance to implement a workflow for producing parts from solid wood (as opposed to sheet materials) on my CNC router, and it turned out pretty great! Now if I can just find a way to automate sanding and finishing…
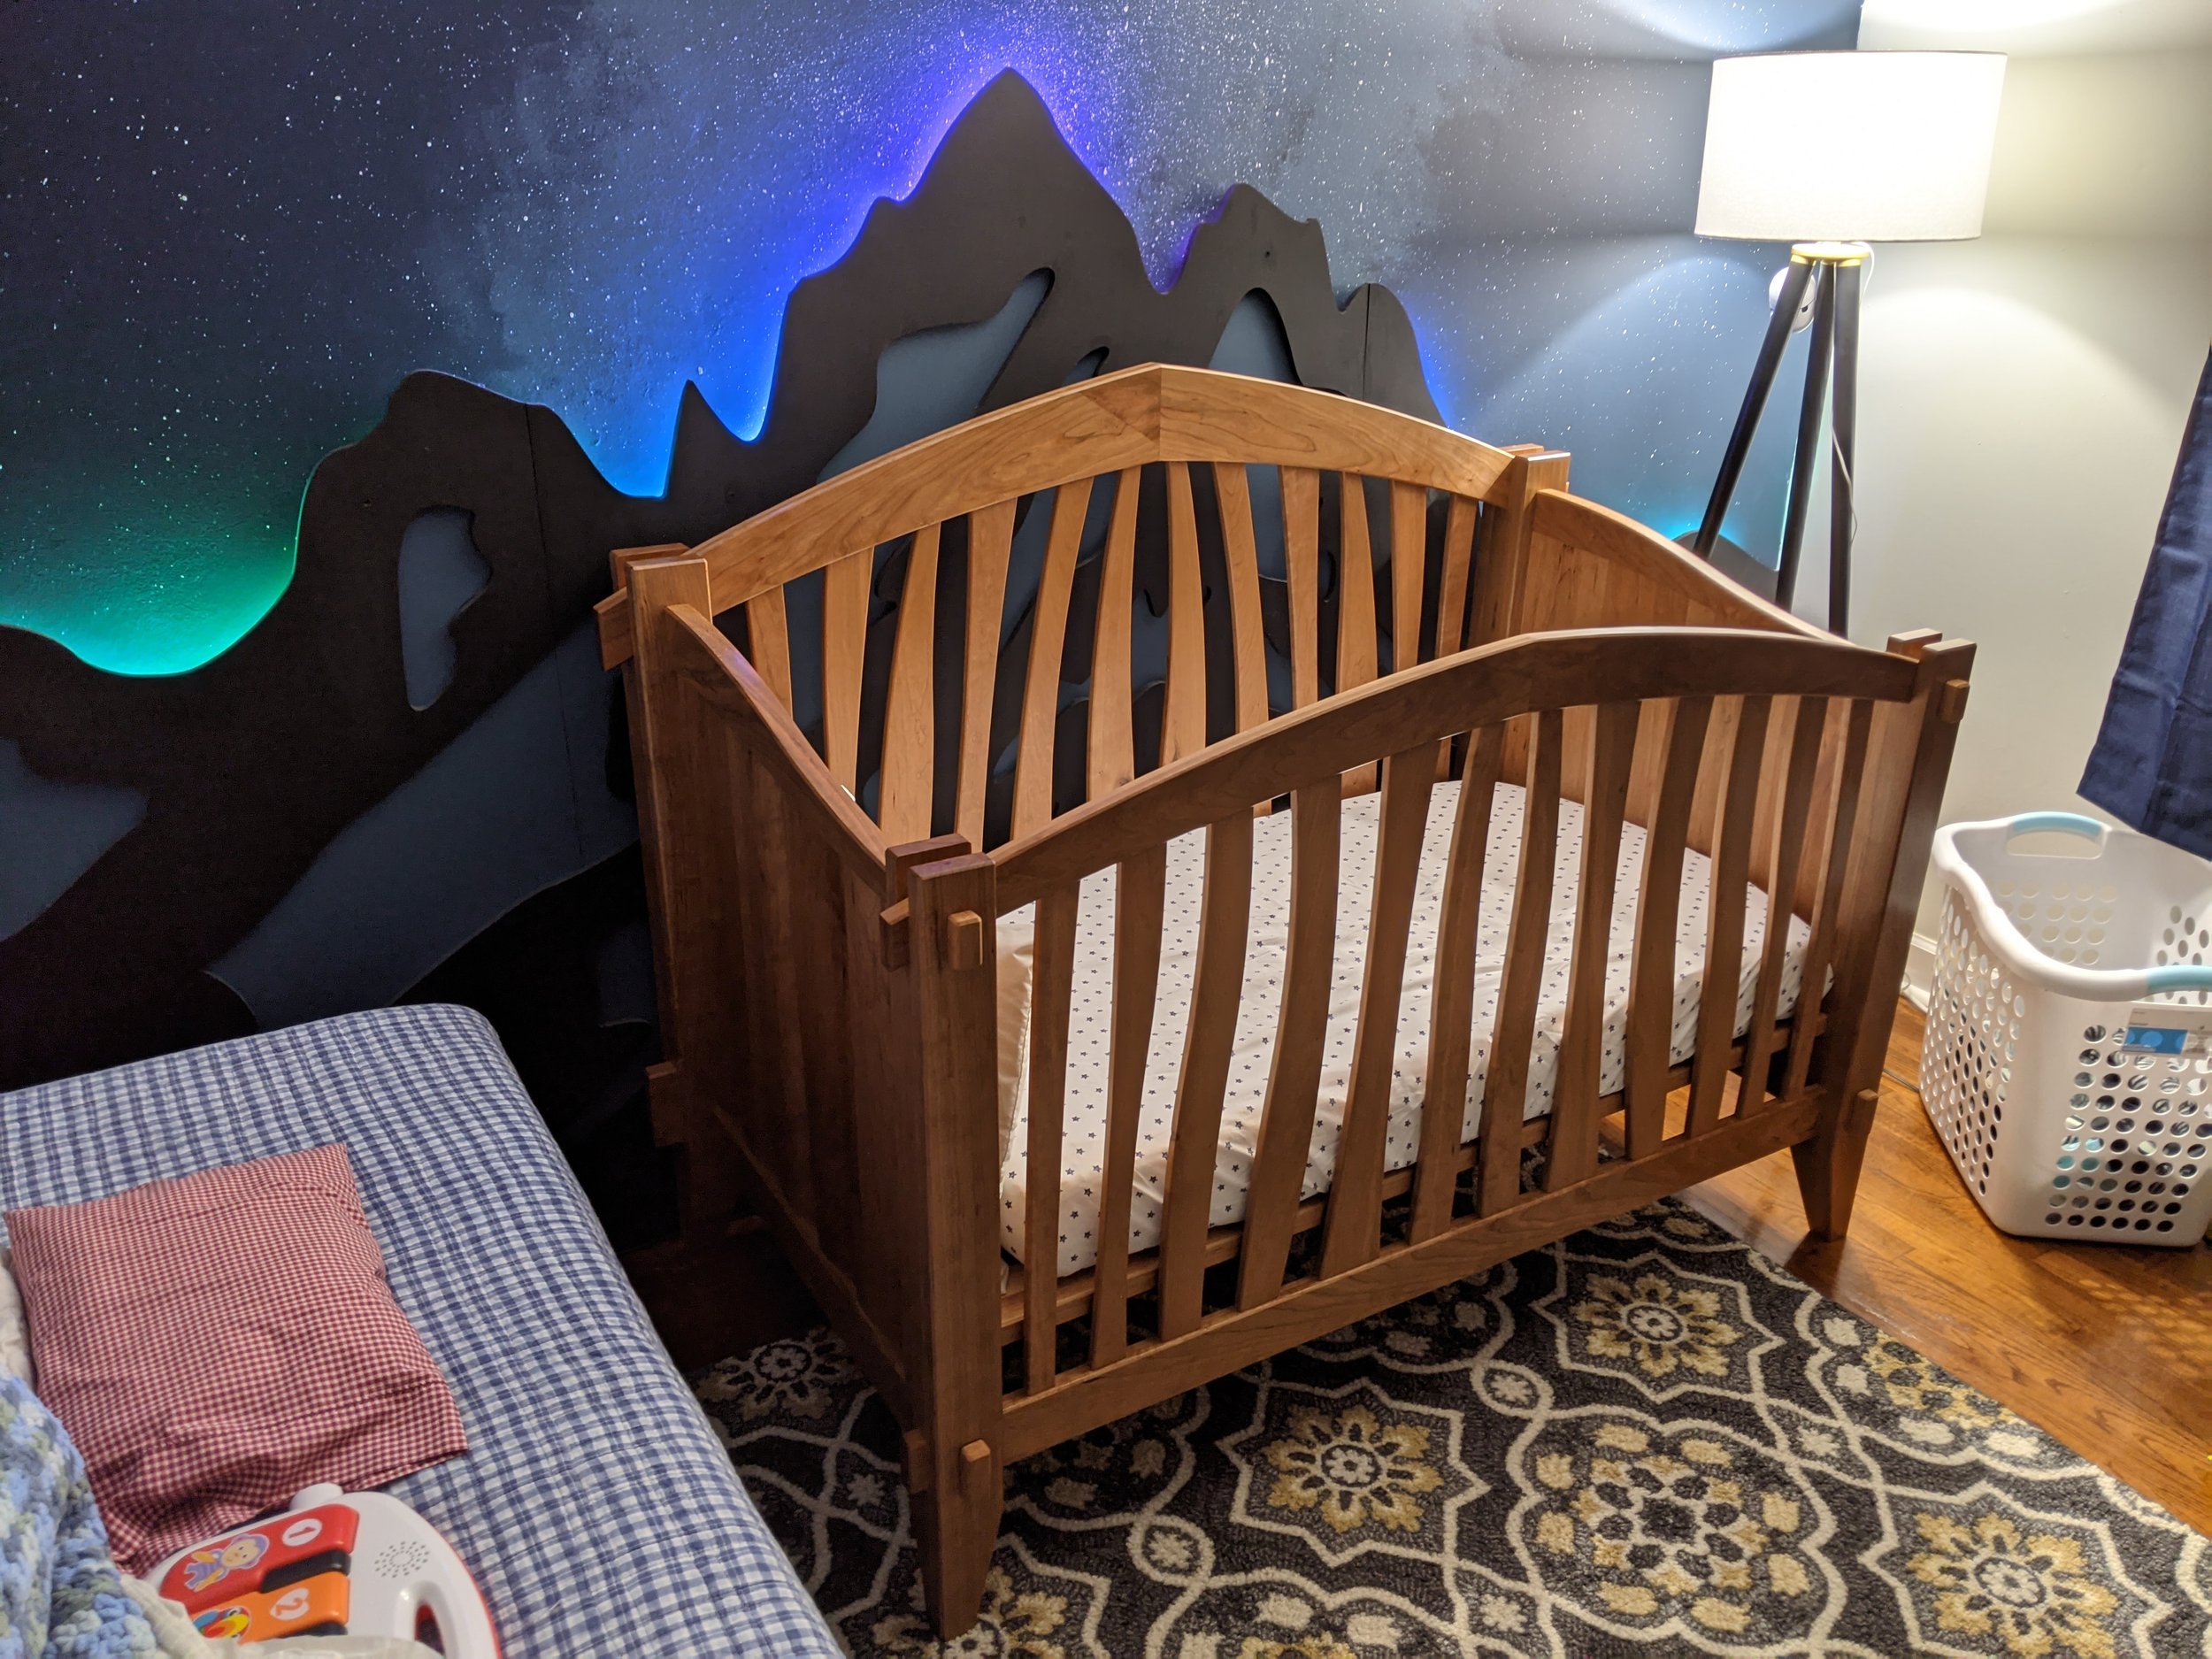
The design concept for the crib was Craftsman-meets-Art Nouveau - I wanted a really solid rectilinear frame that could survive growing into a rowdy little kid’s bed, softened by graceful but playful curves. The crib also needed to knock down into flat pieces for movement through our narrow hallways and easy conversion to a bed a few years from now.
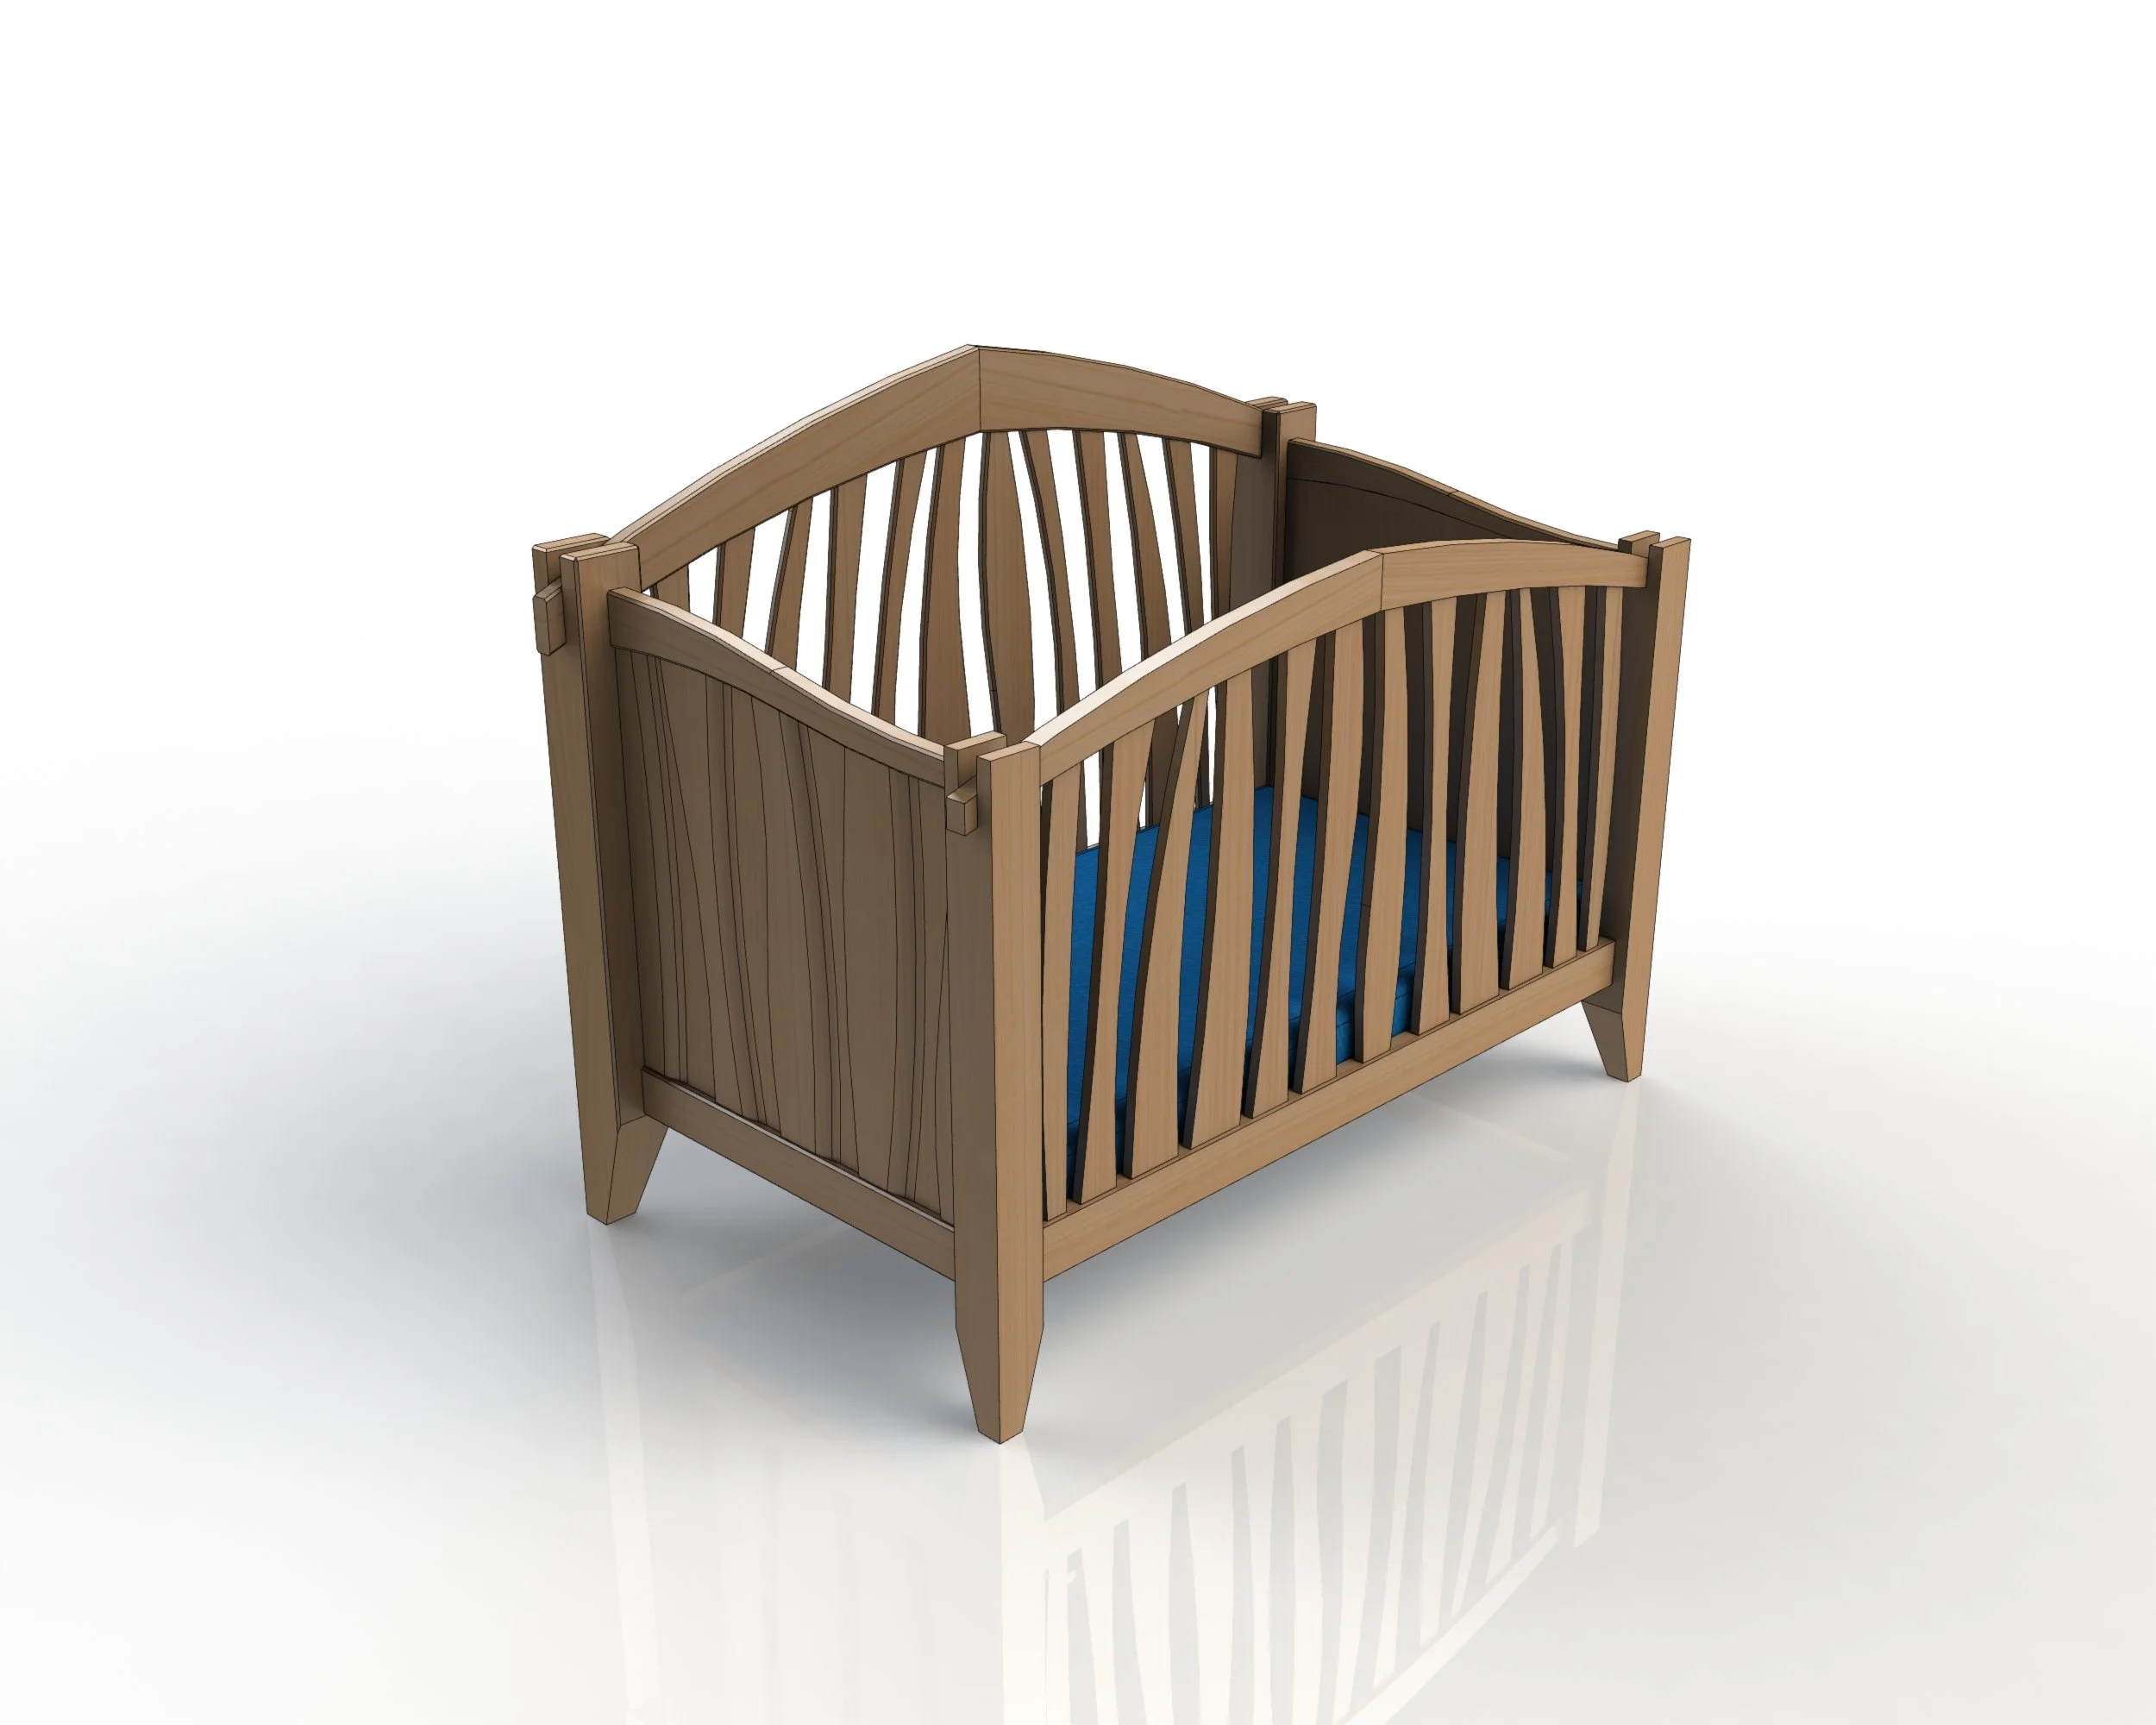
This was the final form concept rendering in Solidworks before I proceeded with detailed design. I started with paper sketches, then established real dimensions based on mattress sizes and crib safety regulations, then moved to Solidworks and played around with forms that worked for the material I had on hand and the capabilities of my CNC router.
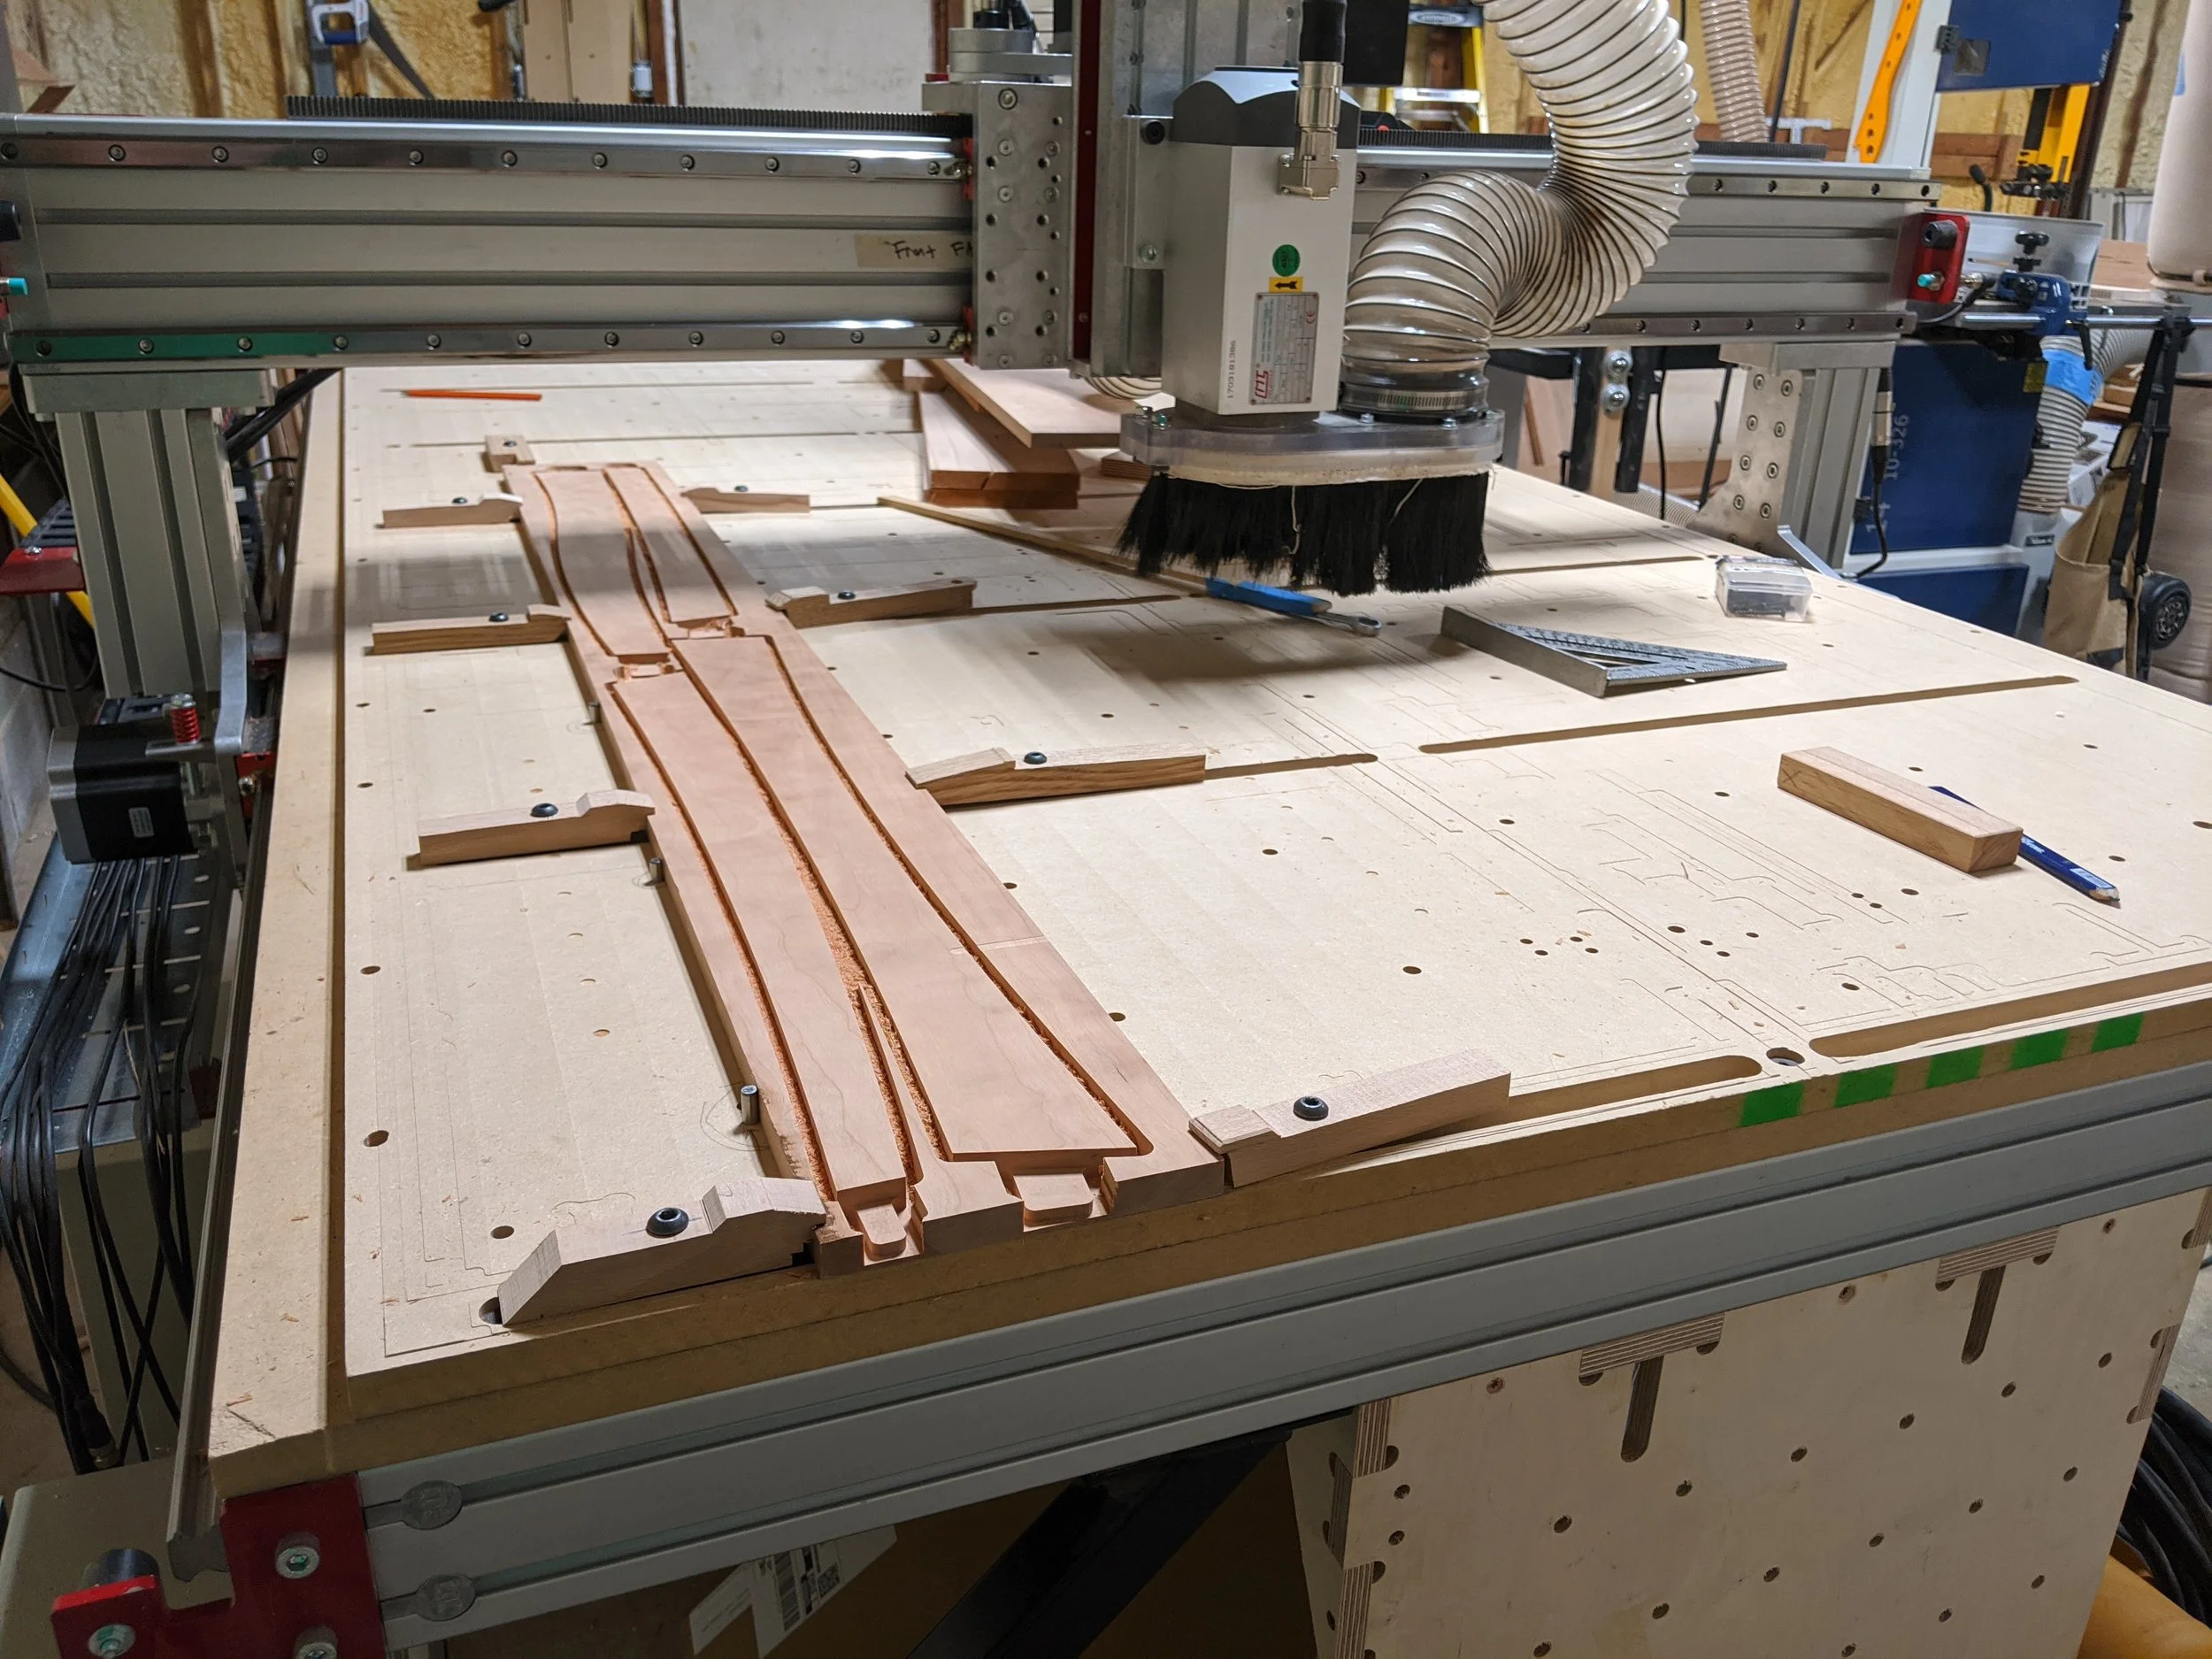
I broke the model down into individual parts, then nested those in models of individual boards, created toolpaths in CAM software, milled the boards on planer/jointer/drum sander, and then started milling on my AvidCNC 3-axis router.
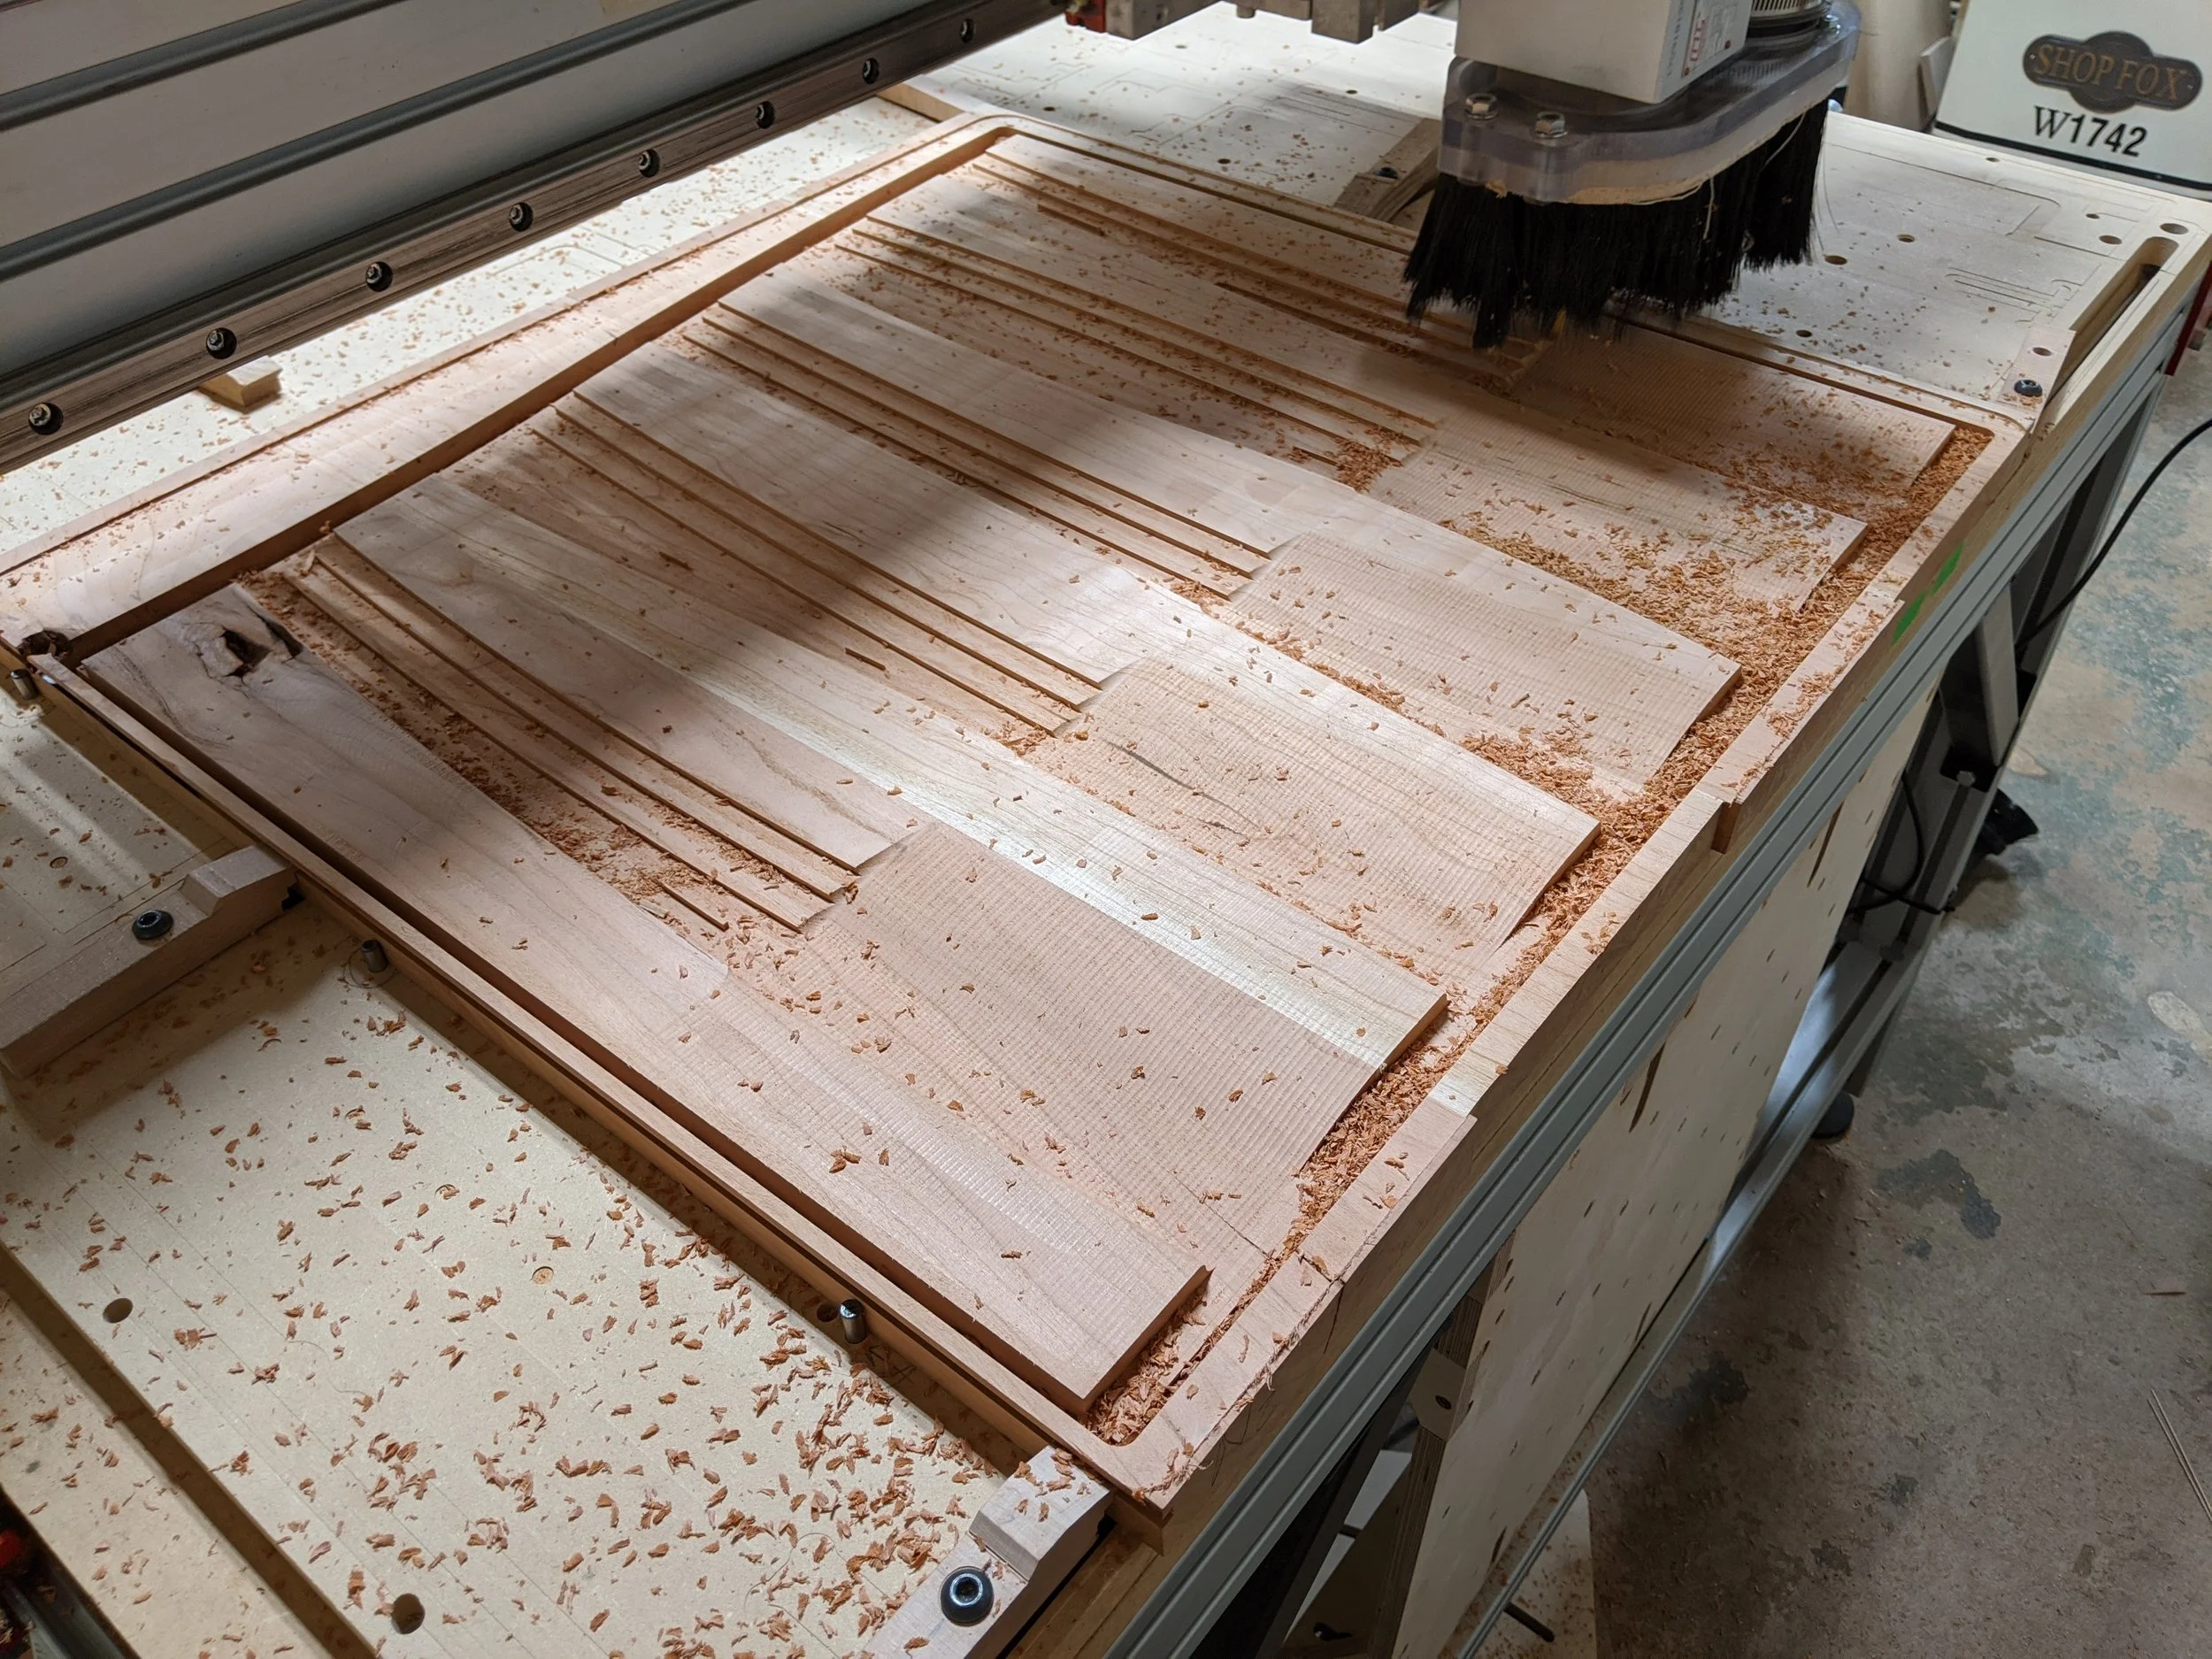
The joinery design was mortise-and-tenon modified to allow mortises to be milled by the CNC router in the same operation as the outline cuts. This meant that any parts with mortises were split in half and made in two pieces that got aligned with dowel pins and glued together, thus closing off the open face of the mortises. This was a new technique for me - I've mostly used large-format routers to mill sheet materials, but this very effectively brought the digital workflow to solid wood construction.

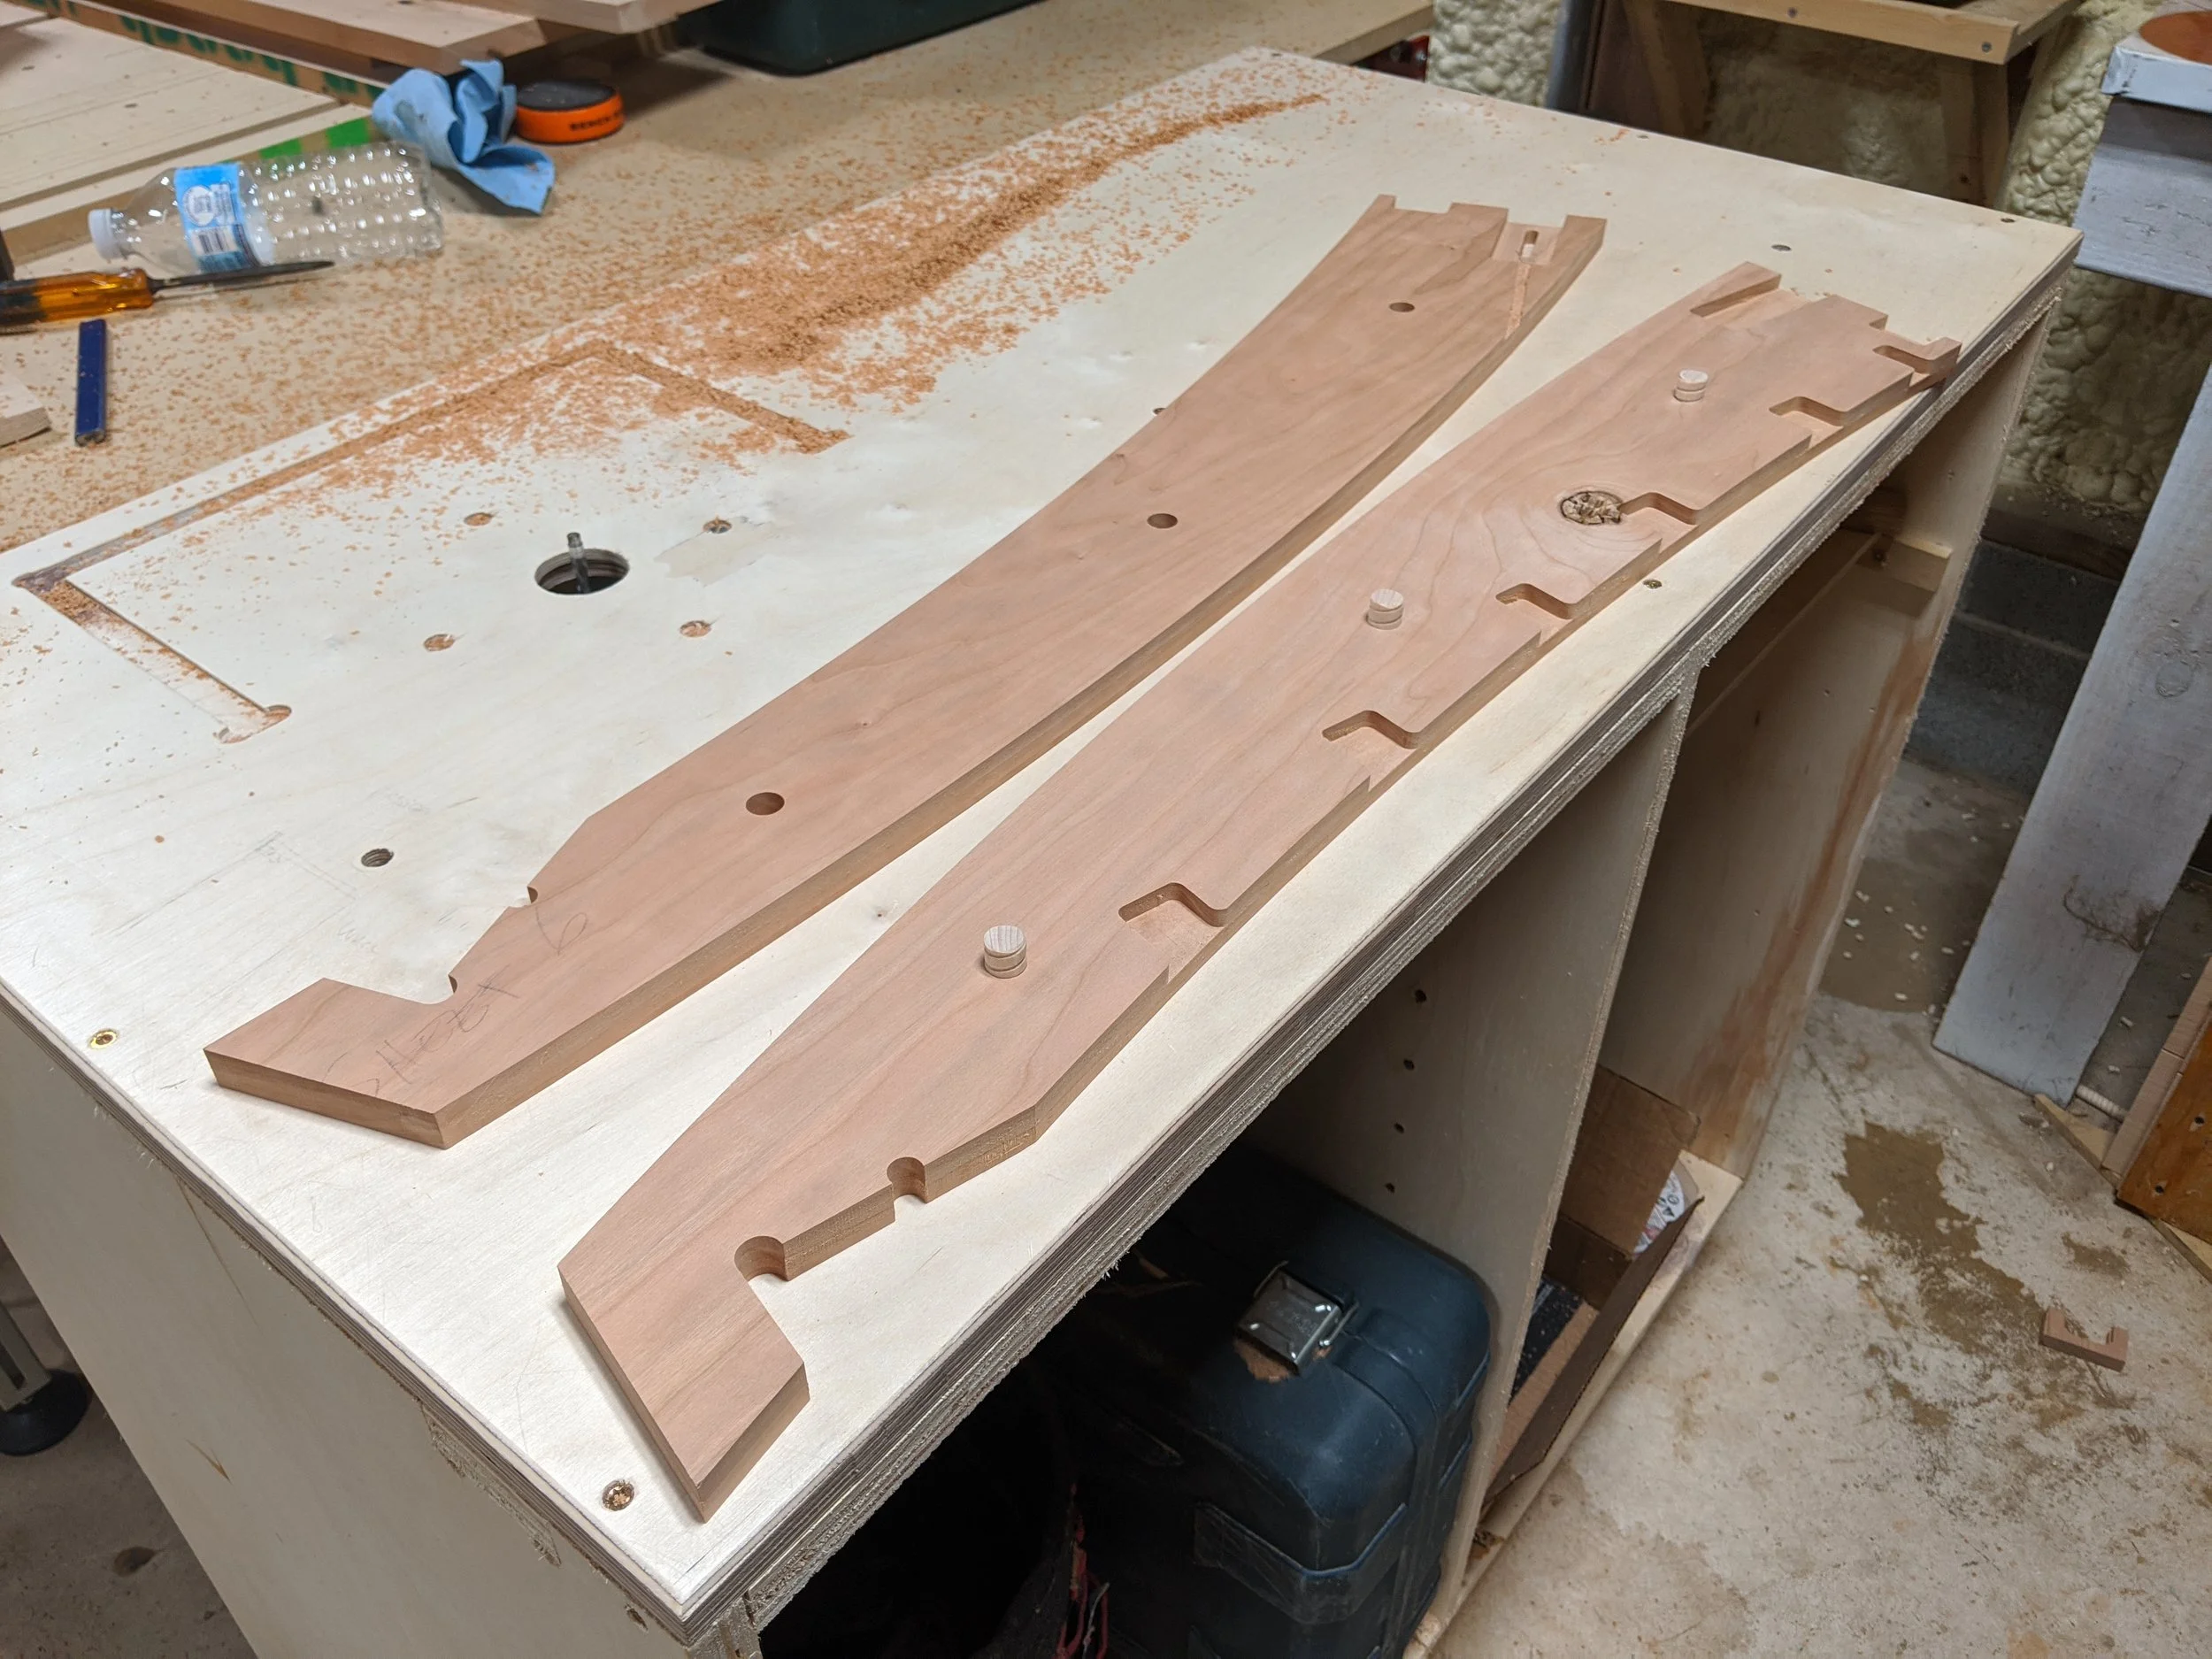
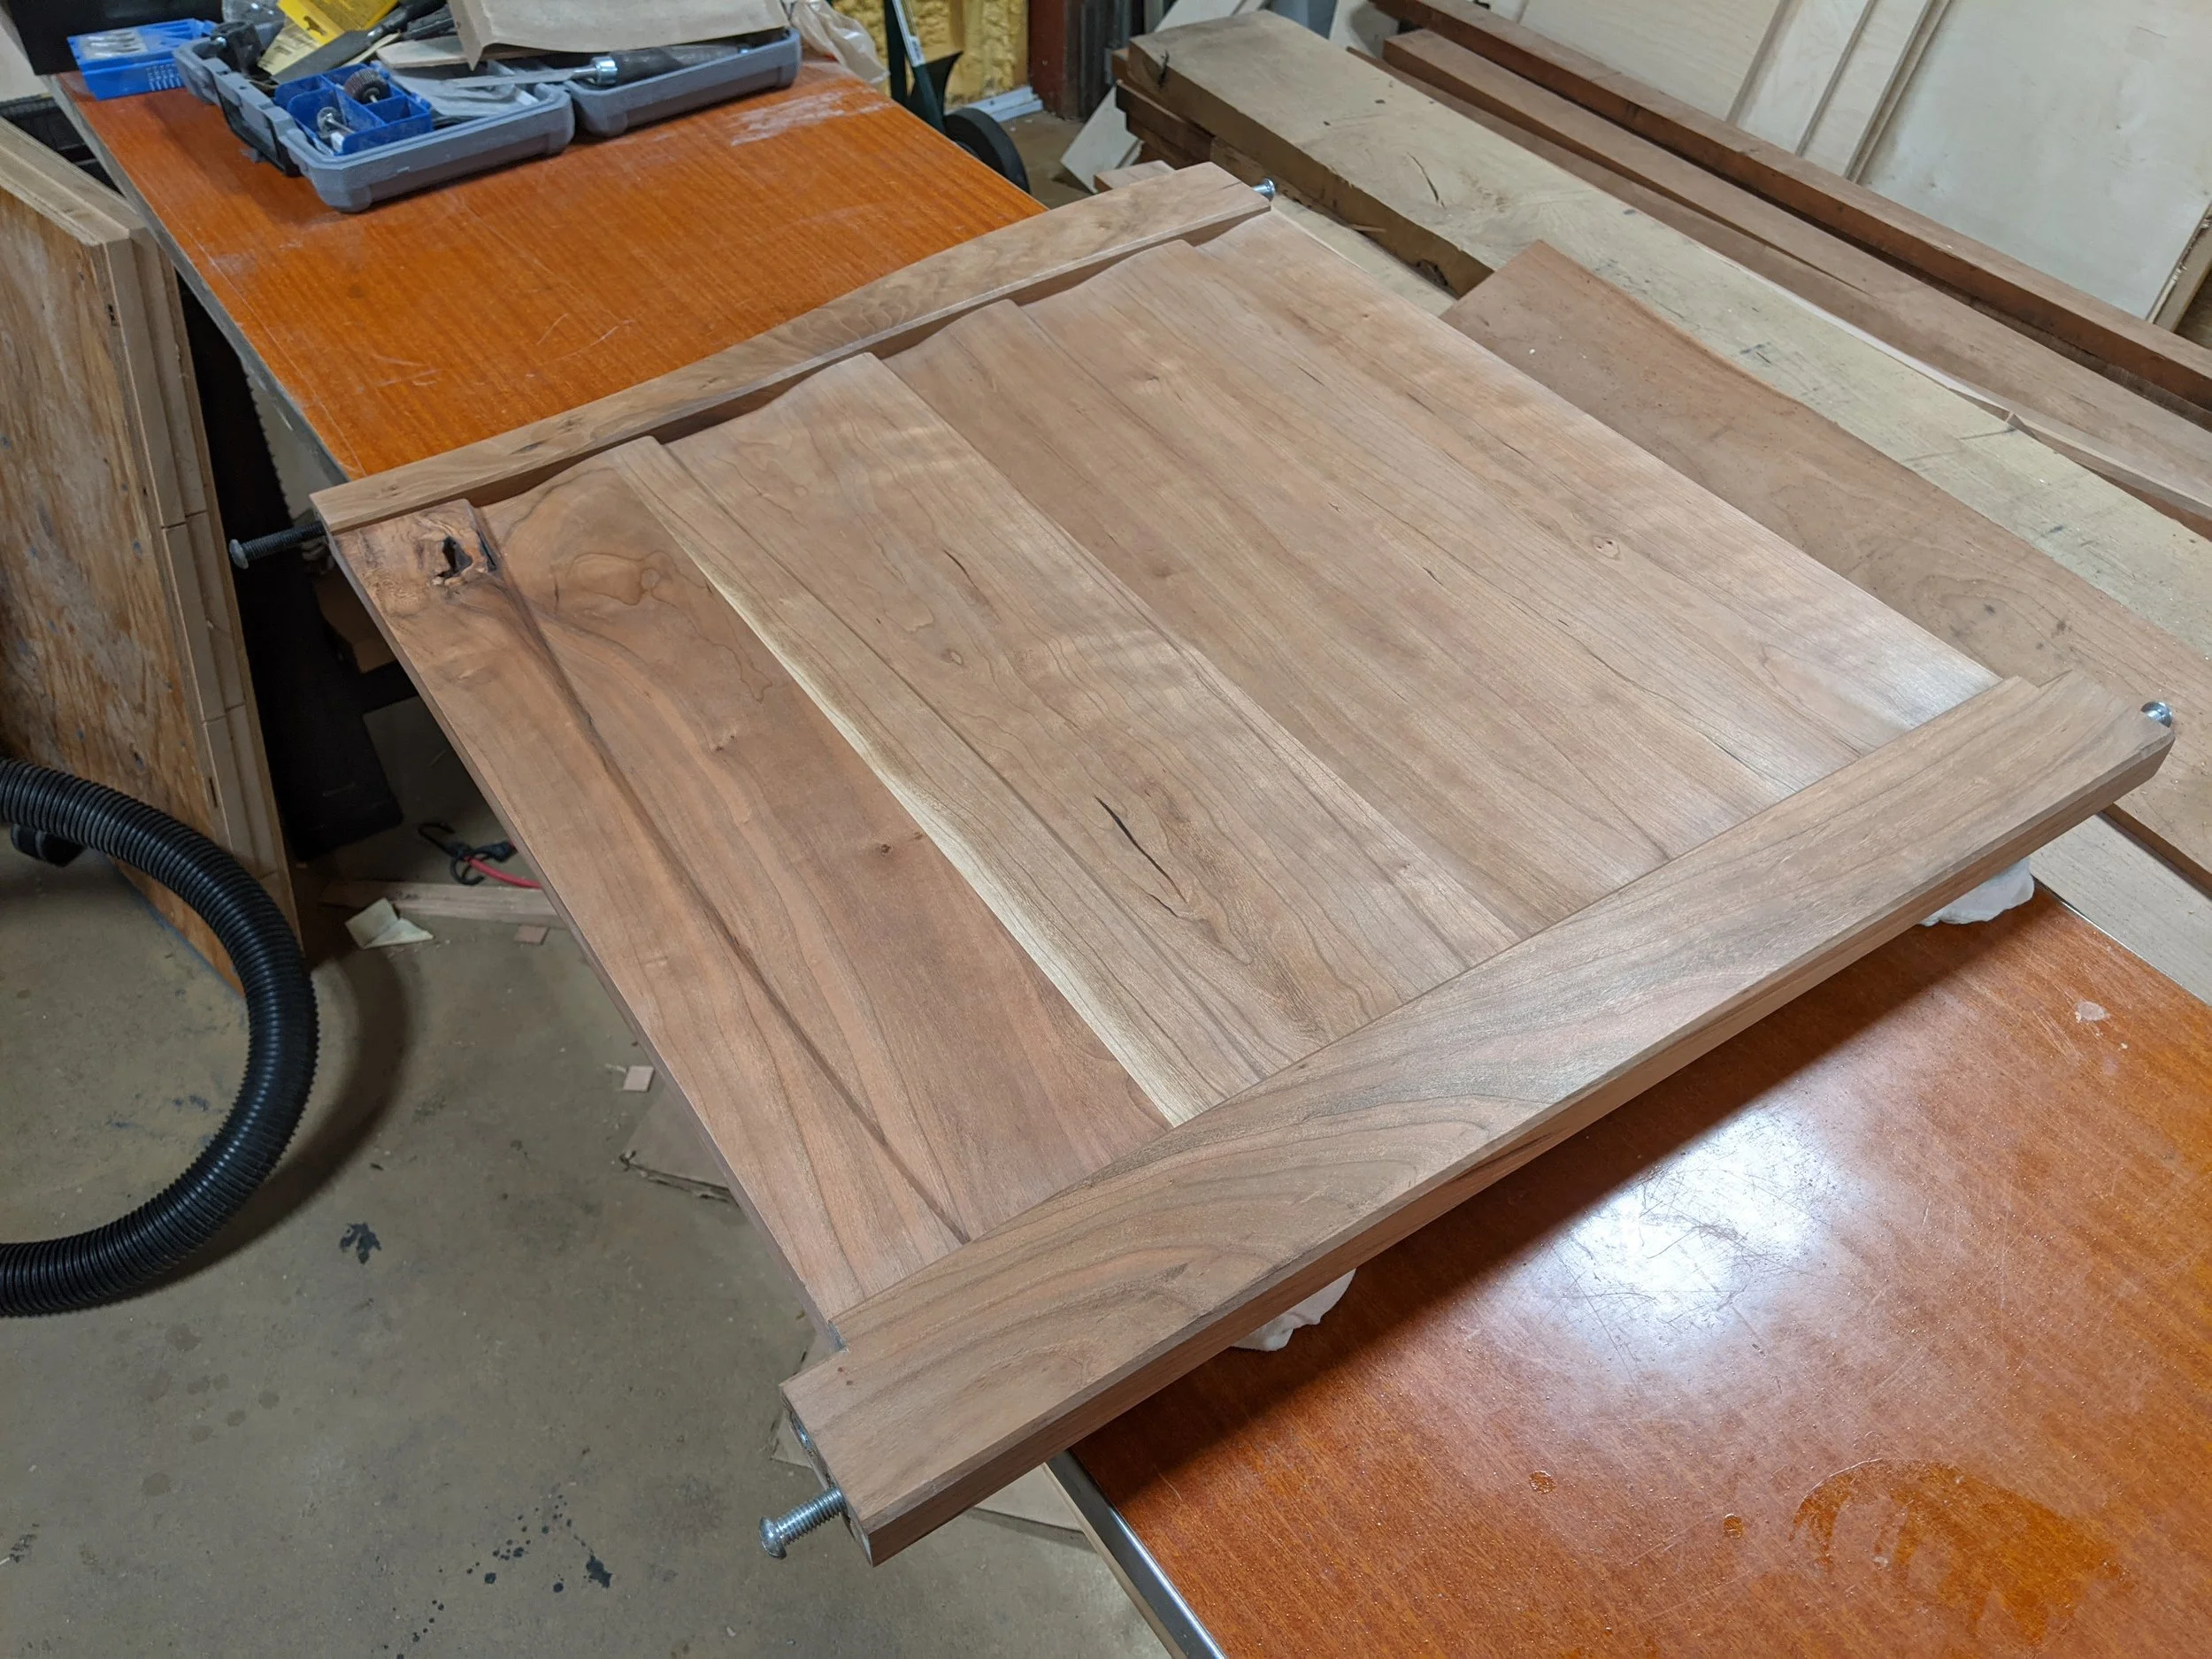
Footboard just before final glue-up. The upper rail was made of four separate pieces to fit in the available material and to allow mortises to be milled on the CNC router. You can see the tenons that were milled onto the ends of each vertical rail, ready to slip into mating mortises on the upper rail.
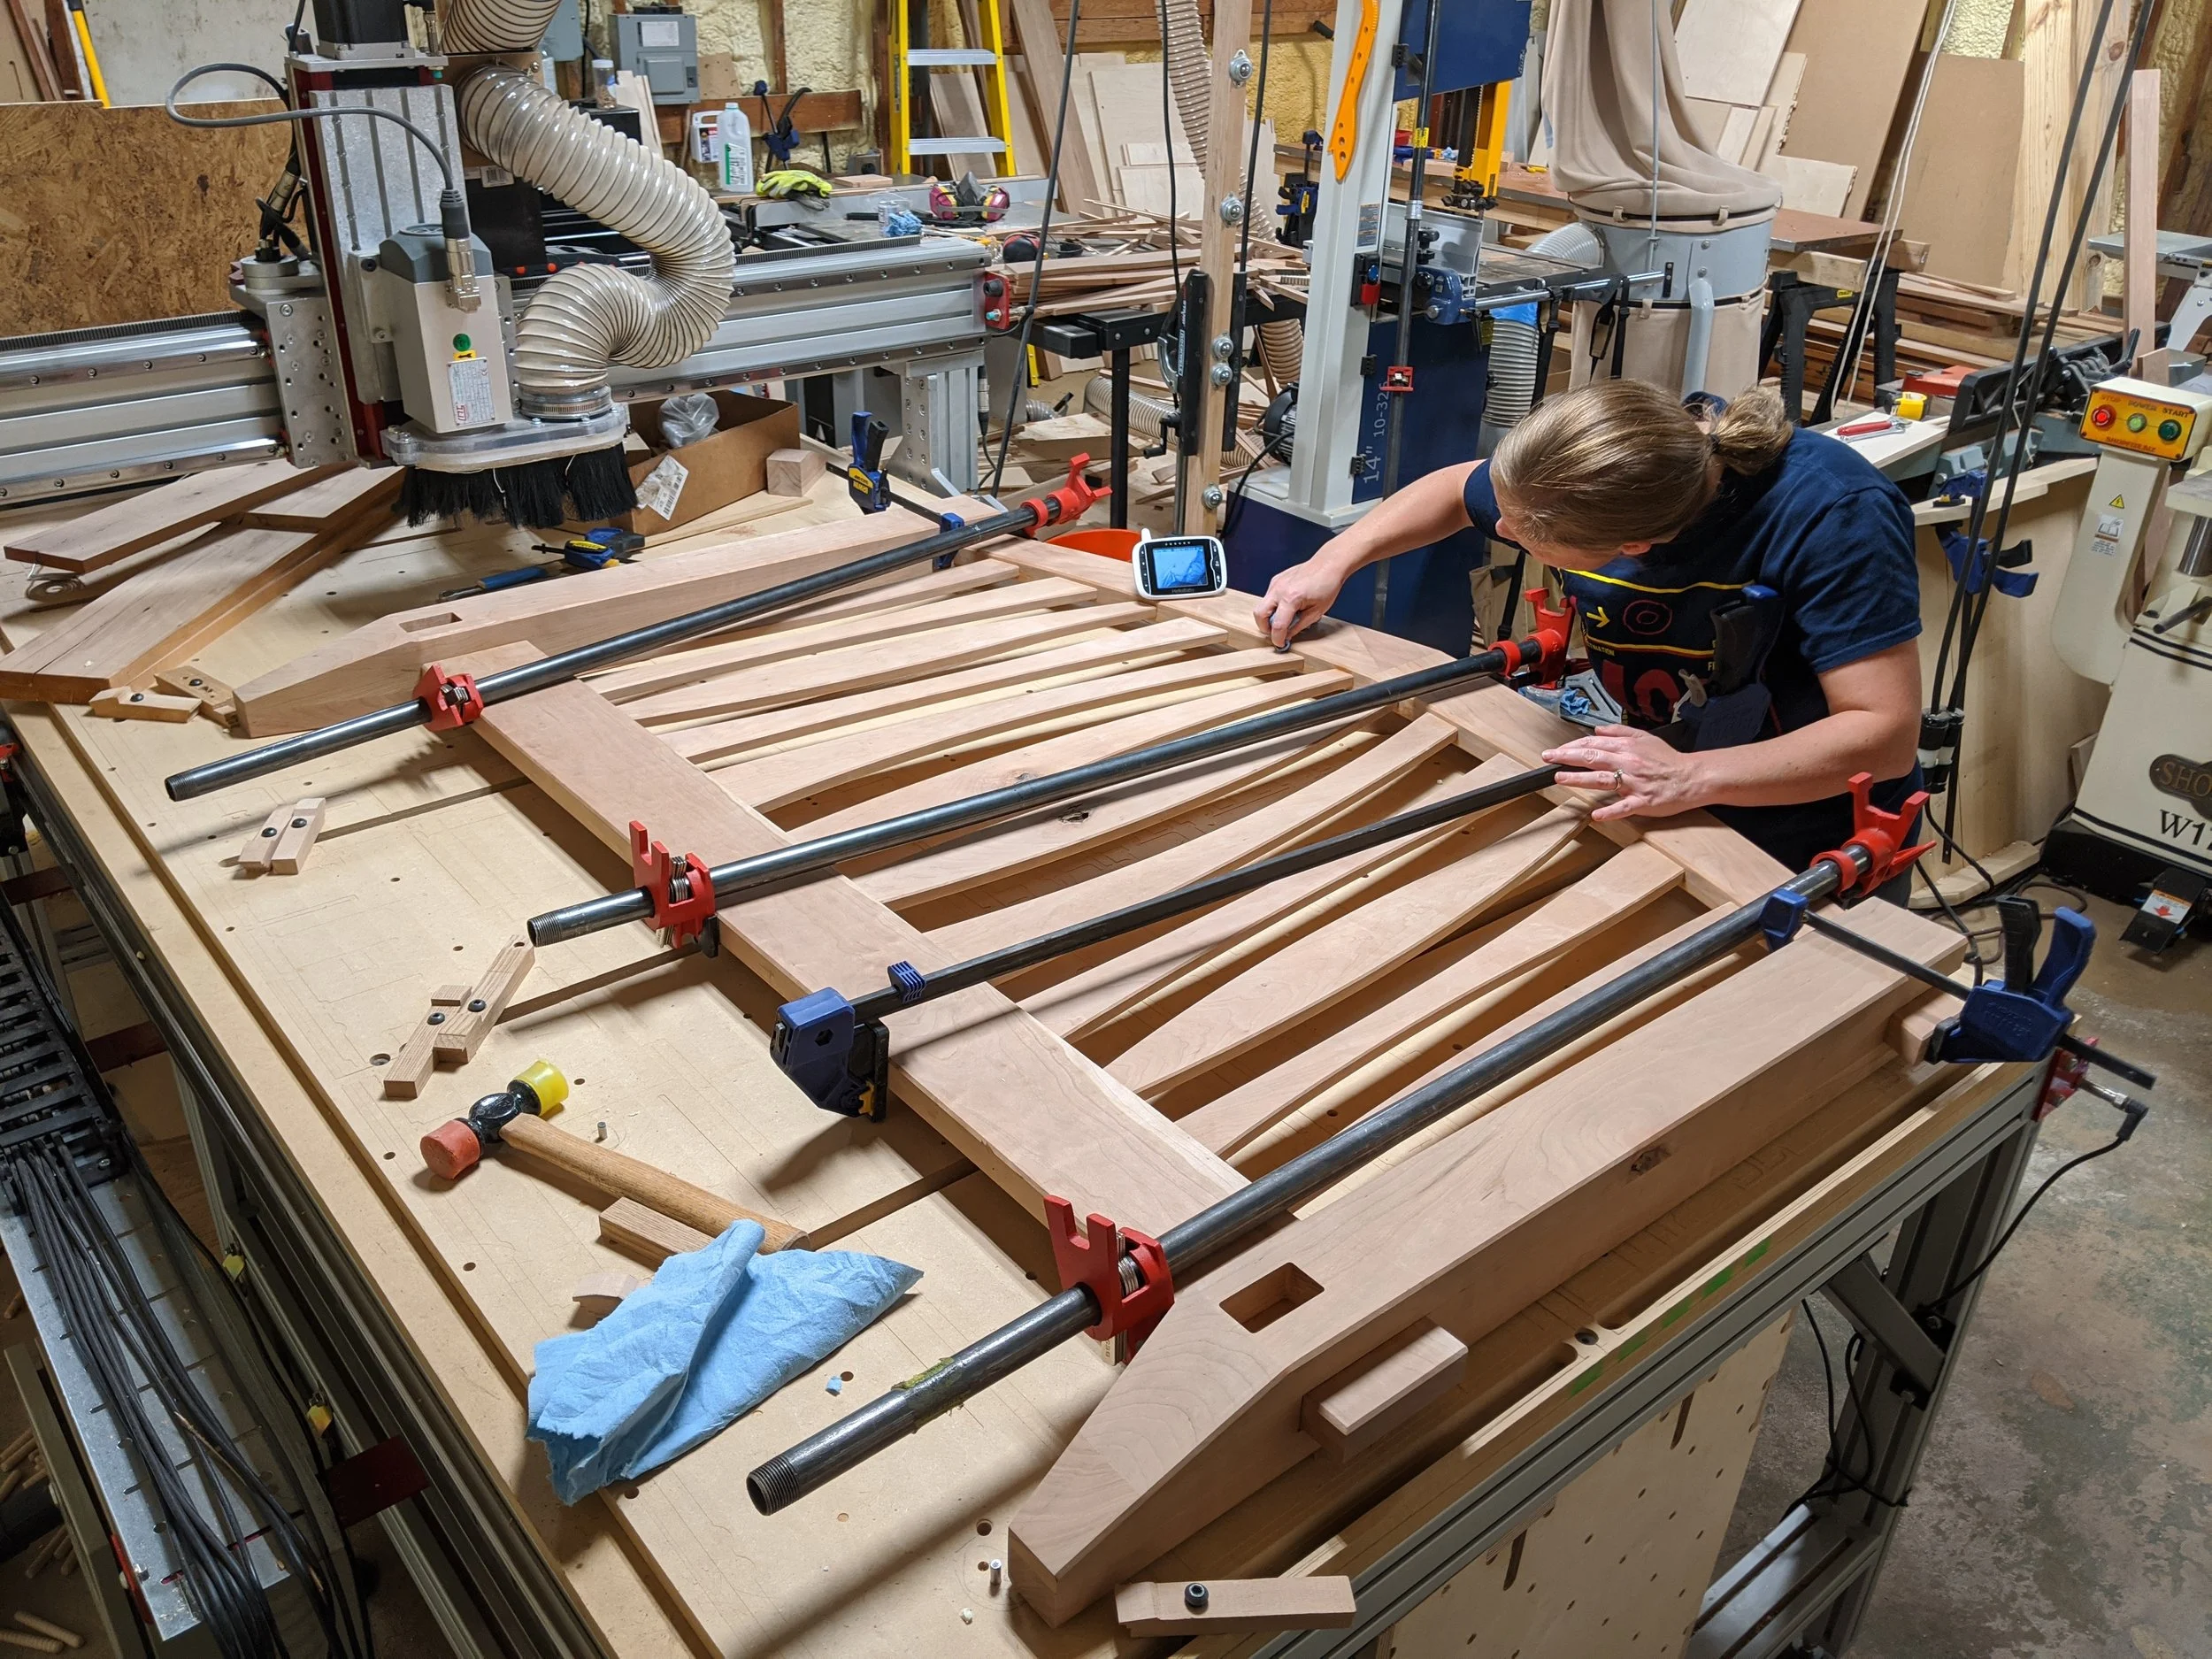
Gluing up the footboard - a big commitment! I needed a helper, so we waited until Abe was asleep and then kept an eye on the monitor.
The side panels took the "curvy natural lines" motif of the rails and translated them to solid surface geometry. I programmed the CNC router to do Z-roughing and then surfacing passes with a ball mill to sculpt the shape that was originally modeled in Solidworks.
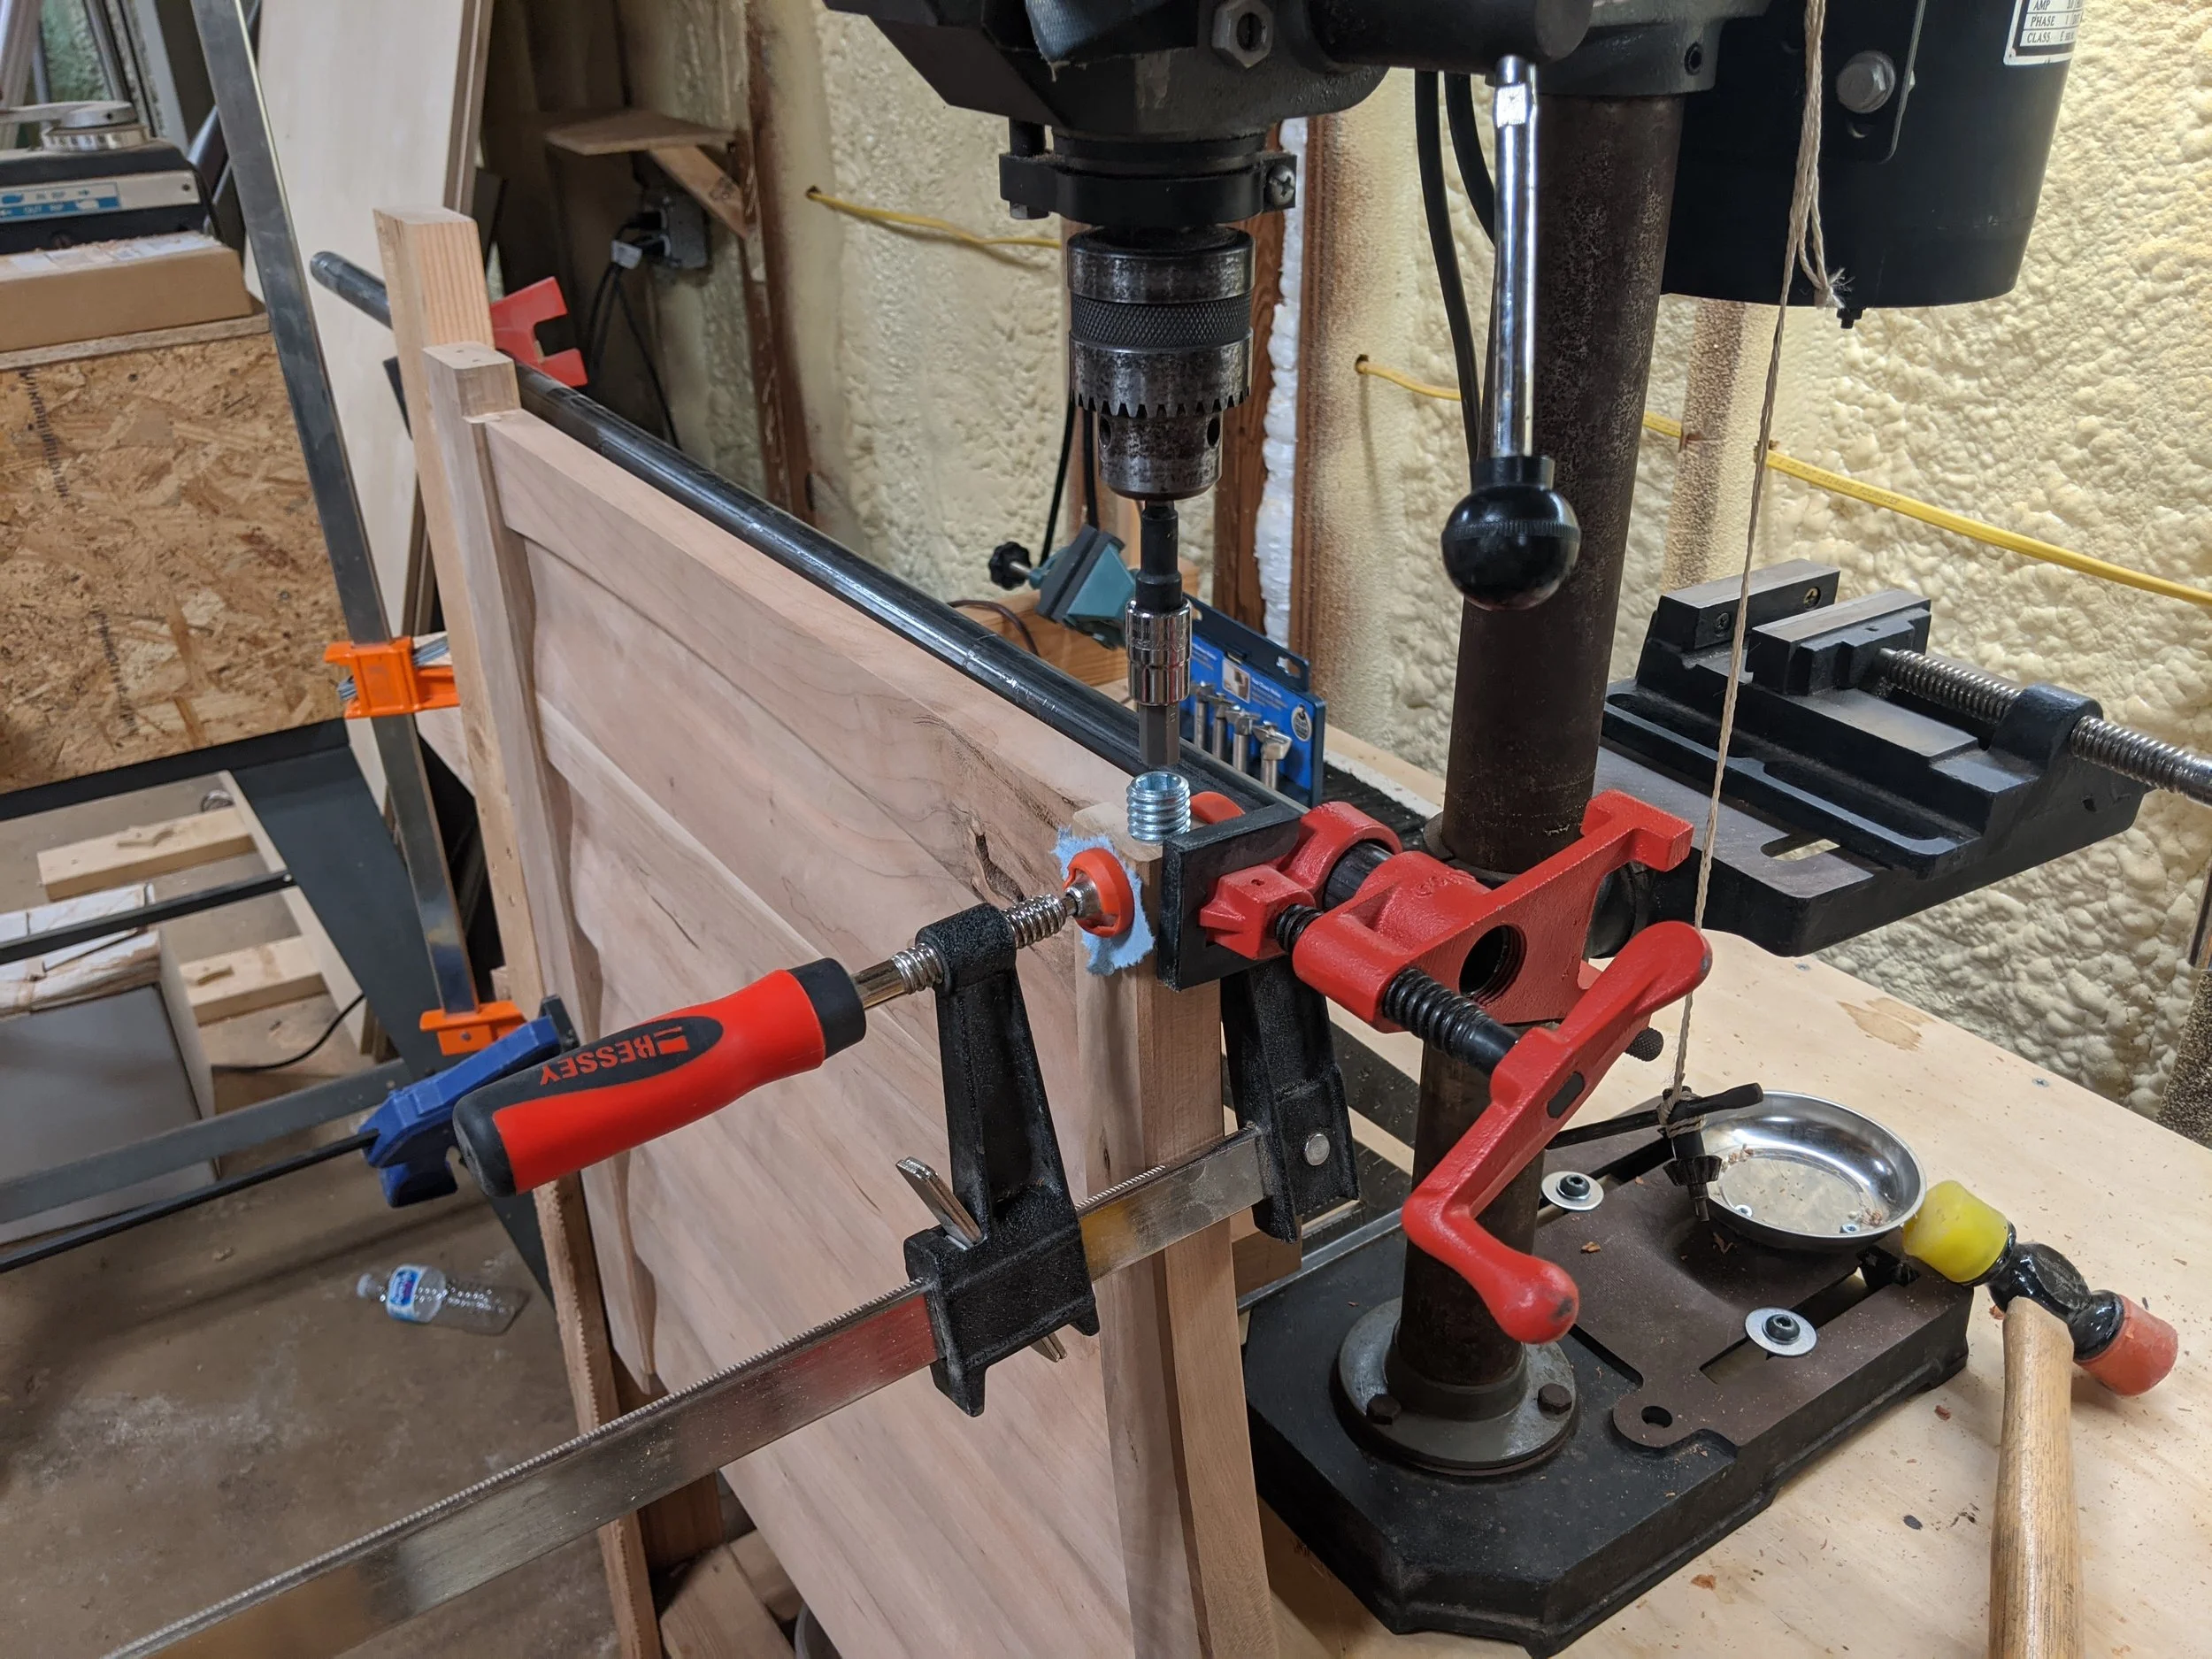
We needed to be able to disassemble the crib to move it around the house and to eventually convert the footboard and headboard into a bed, so I used threaded inserts in the side rails to allow bolts to be join the corners. This was a neat drill press setup that used my workbench surface as a datum plane to allow me to drill holes that were very perpendicular to the side panel ends and then to drive the threaded inserts in with similar perpendicularity.
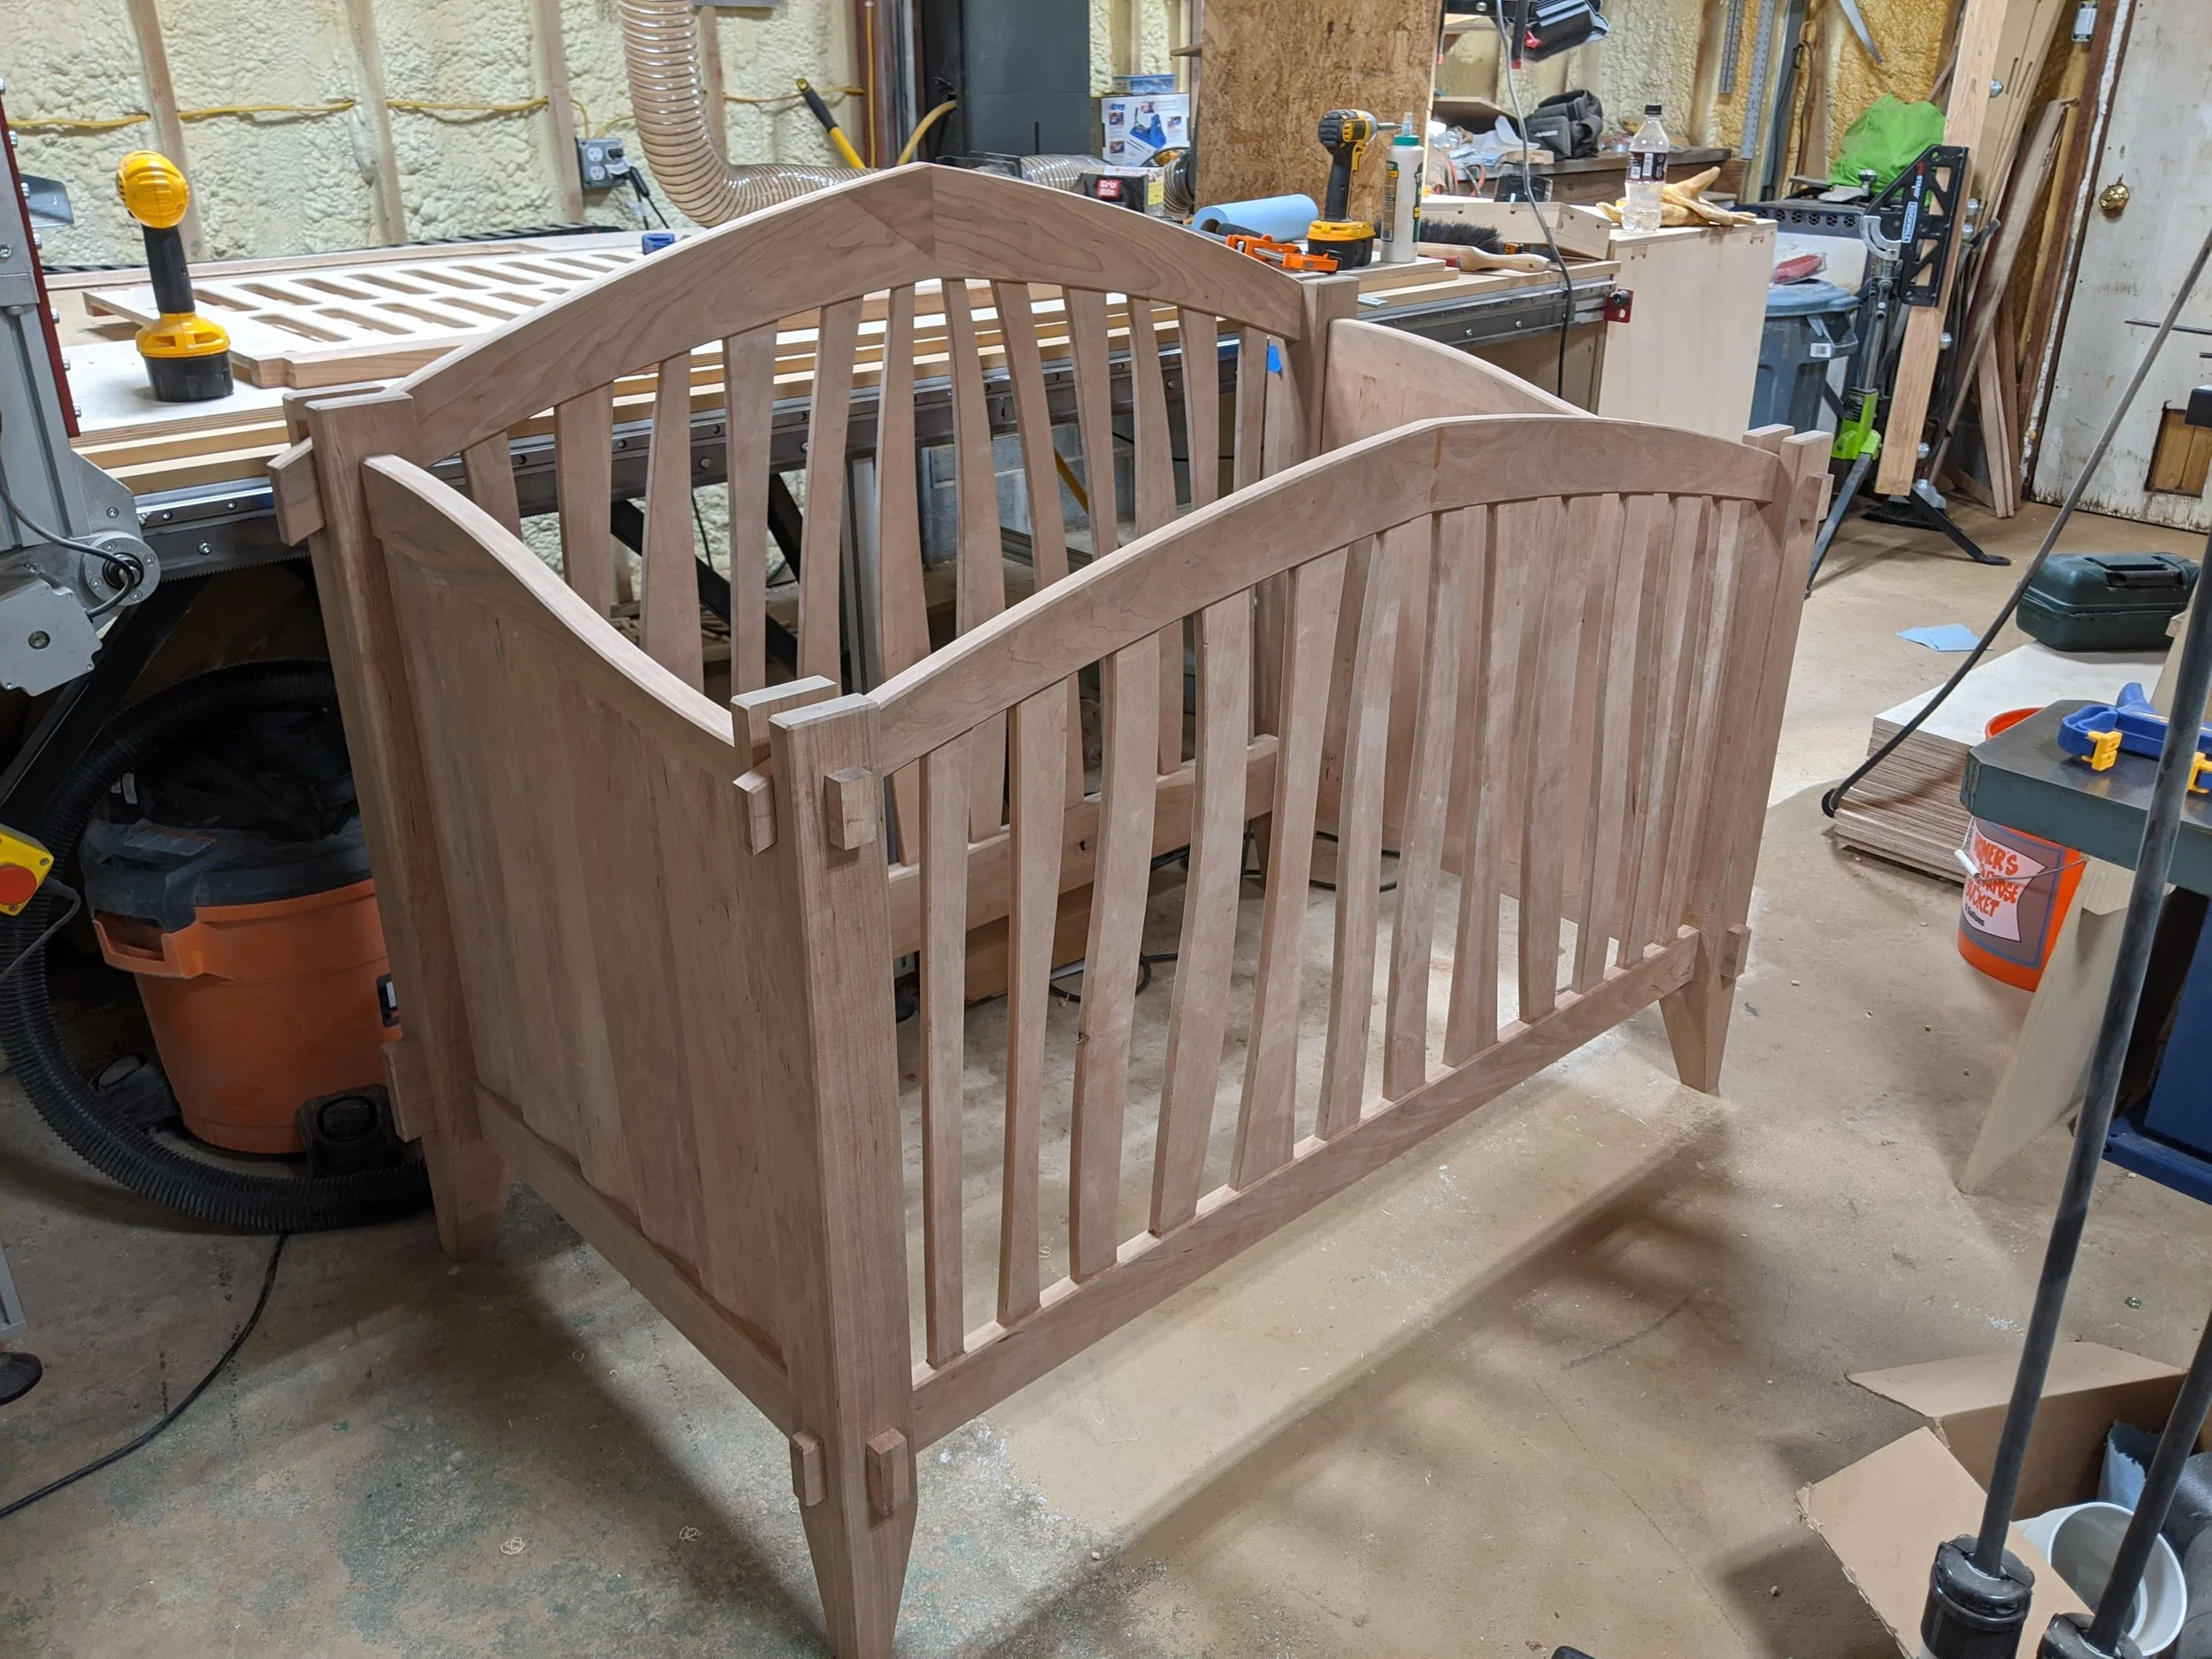
First dry assembly of the whole crib! Note the plugs in the corner posts that cover the joining bolts - they give the illusion that the top and bottom rails of the side panels protrude through the corner in the same way that the top and bottom rails of the footboard do.
Finished side panel. These will (sadly!) get replaced with bed rails when the crib is converted to a twin bed for the boys once they get older.